Plongez dans Lyon - WebGL scene case study
The “Plongez dans Lyon” website is finally live. We’ve worked hard with the Danka team and Nico Icecream to build a buttery smooth immersive website we’re particularly proud of.
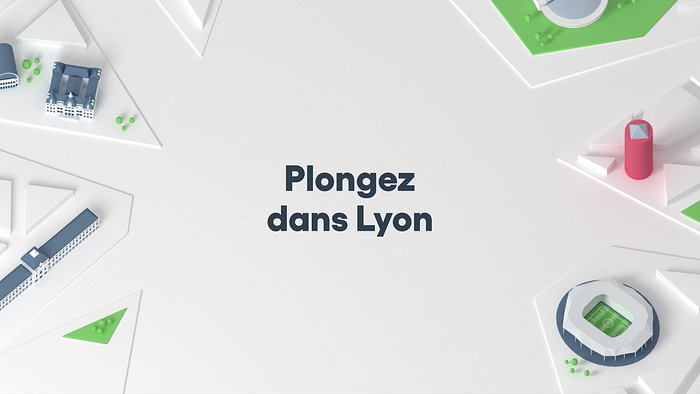
https://www.plongezdanslyon.fr/
The site, built for ONLYON Tourism and conventions, aims to showcase Lyon’s most iconic event venues.
Upon watching a short introduction video, the user can enter an interactive picturesque map of the city, with all the venues modeled as 3D objects. Each building is clickable, leading to a dedicated page detailing the locations informations.
Building an immersive experience
The main website navigation experience relies on a cartoon-like WebGL scene featuring a lot of landscape elements, clouds, animated vehicles, shimmering rivers and, of course, buildings.
All in all, it is made of 63 geometries, 48 textures, 32234 triangles (and a bit of post processing magic). When you deal with that amount of objects, you have to organize your code architecture and use a couple of tricks to optimize the performance.
3D scene
All the models were created by the talented 3D artist Nicolas Dufoure aka Icecream in 3ds Max and then exported as GTLF objects with Blender.
Art direction and visual composition
Nico and the Danka team began the project’s creative process with early iterations of the map and quickly settled on a low-poly and colorful art direction.

We knew we’d have to add two dozens of clickable buildings so we had to find the right balance between visual composition, navigation ease and performance.

To keep the number of triangles drawn to a minimum, we also decided soon enough to limit the number of 3D objects on the scene’s left and right far sides. But after a while we realised we would actually have to prevent the user from seeing those areas.
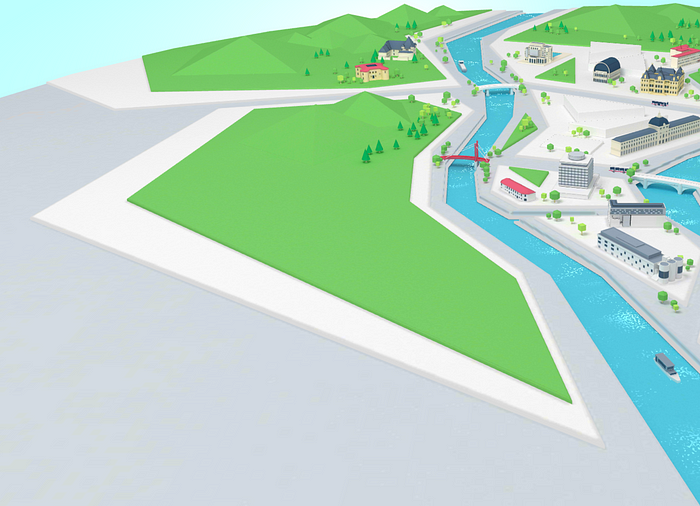
Camera handling
To avoid any conflicts between paning, zooming and animations, I had decided early on to code the camera controls from scratch. This proved very handy then, since it wasn’t really difficult to add thresholds to the camera possible positions afterwards.
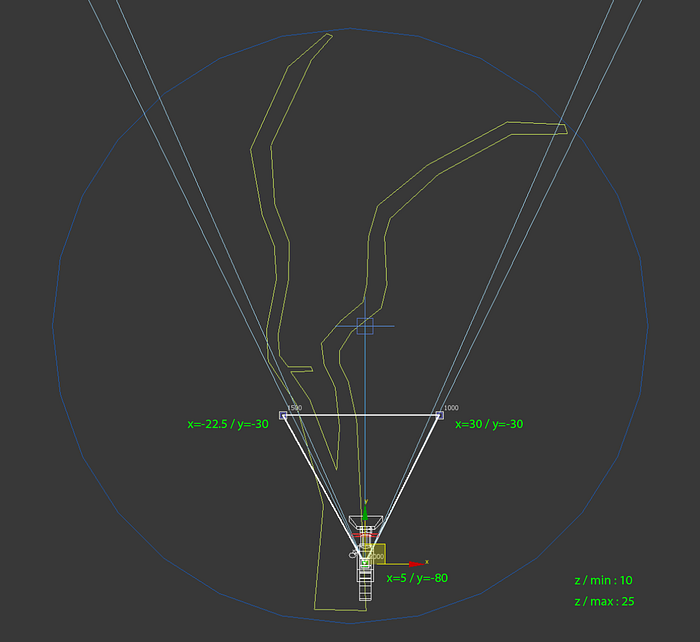
That way, we successfully constrained the camera movements while still allowing the user to explore all the map essential areas.
Bake & compress textures
To spare a lot of GPU workload, another obvious thing Nico and I agreed with was to bake all the textures with global illumination and shadows.
Of course, it means more modeling work and it can be annoying if your scene needs frequent changes. But it offloads a lot of computation from the GPU (light shadings, shadow map…) and in our case it was definitely worth it.
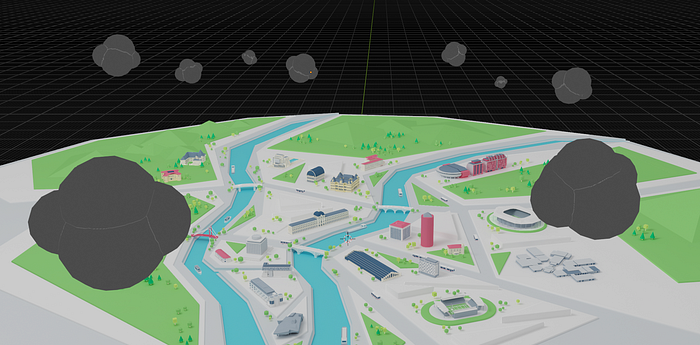
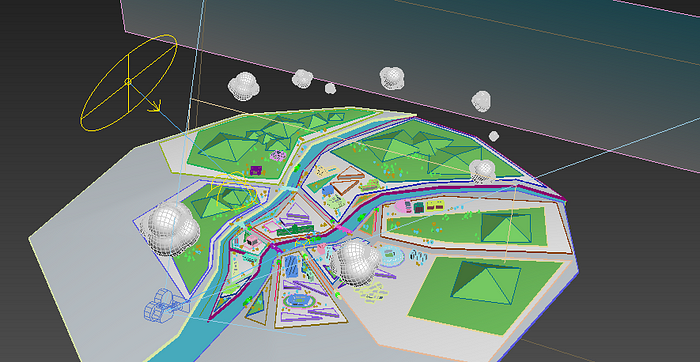
When you deal with this amount of textures (often 1024x1024, 2048x2048 or even 4096x4096 pixels wide), another thing you should consider is using basis compressed textures.
If you’ve never heard of it, basis textures basically take less GPU memory than jpeg/png textures. They also lower main thread bottlenecks when they’re uploaded from the CPU to the GPU.
You can generate basis textures super easily here: https://basis.dev.jibencaozuo.com/
Code architecture & organization
The best way to organize your code when you need to handle that many assets is to make several javascript classes (or functions, it is up to you of course) and organize them in directories and files.
Typically, this is how I organized this project’s files and folders:
webgl|-- data| |-- objects.js| |-- otherObjects.js|-- shaders| |-- customShader.js| |-- anotherShader.js|-- CameraController.js|-- GroupRaycaster.js|-- ObjectsLoader.js|-- WebGLExperience.js
- The data folder contains javascript objects in separate files with all the infos
- The shaders folder contains all the project custom shaders in separate files
- CameraController.js: a class to handle all the camera movements & controls
- GroupRaycaster.js: a class to handle all “interactive” objects raycasting
- ObjectsLoader.js: a class to load all our scene objects
- WebGLExperience.js: the main class that inits the renderer, camera, scene, post processing and handles all of our other classes
Of course you are free to organize it differently. Some like to create separate classes for the Renderer , Scene and Camera for example.
Core concept code excerpts
So let’s jump into the code itself!
Here’s a detailed example of what some of the files actually look like:
Integrating with Nextjs / React
Since the project is using Nextjs, we need to instantiate our WebGLExperience class inside a React component.
We’ll just create a WebGLCanvas component and put it outside our router so it always lies in the DOM.
Custom shaders
I obviously had to write a few custom shaders from scratch for this website.
Here’s a little breakdown of the most interesting ones.
Shader chunks
If you look closely at the example code above, you’ll see that I’ve allowed each object to use its own custom shader if needed.
In fact, every meshes on the scene use a ShaderMaterial, because when you click on a building, a grayscale filter is applied to all other scene meshes:
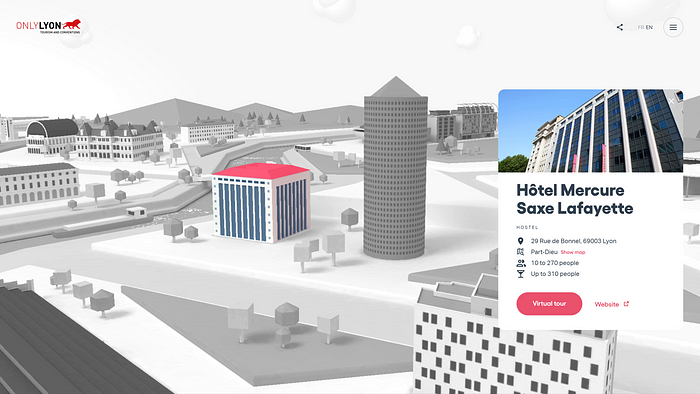
This effect is achieved thanks to this super simple piece, or chunk, of glsl code:
const grayscaleChunk = `
  vec4 textureBW = vec4(1.0);
  textureBW.rgb = vec3(gl_FragColor.r * 0.3 + gl_FragColor.g * 0.59 + gl_FragColor.b * 0.11);
  gl_FragColor = mix(gl_FragColor, textureBW, uGrayscale);
`;
Since all the objects had to respect this behavior, I’ve implemented it as a “shader chunk”, the way three.js is originally building its own shaders internally.
For example the most basic scene’s mesh fragment shader used looks like this:
varying vec2 vUv;

uniform sampler2D map;
uniform float uGrayscale;

void main() {
 gl_FragColor = texture2D(map, vUv);

 #include <grayscale_fragment>
}
And then we just take part of the material’s onBeforeCompile method:
material.onBeforeCompile = shader => {
 shader.fragmentShader = shader.fragmentShader.replace(
   "#include <grayscale_fragment>",
   grayscaleChunk
 );
};
That way, if I ever had to tweak the grayscale effect, I just had to modify one file and it would update all my fragment shaders.
Clouds
As I mentionned above, we’ve decided not to put any real lights in the scene. But since the clouds are (slowly) moving, they needed to have some kind of dynamic lightning applied to them.
To do that, the first thing I needed to do was passing the vertices world positions and normals to the fragment shader:
varying vec3 vNormal;
varying vec3 vWorldPos;

void main() {
 vec4 mvPosition = modelViewMatrix * vec4(position, 1.0);
 gl_Position = projectionMatrix * mvPosition;

 vWorldPos = (modelMatrix * vec4(position, 1.0)).xyz;
 vNormal = normal;
}
Then in the fragment shader, I used them to calculate the diffuse lightning based on a few uniforms:
varying vec3 vNormal;
varying vec3 vWorldPos;

uniform float uGrayscale;

uniform vec3 uCloudColor; // emissive color
uniform float uRoughness; // material roughness
uniform vec3 uLightColor; // light color
uniform float uAmbientStrength; // ambient light strength
uniform vec3 uLightPos; // light world space position

// get diffusion based on material's roughness
// see https://learnopengl.com/PBR/Theory
float getRoughnessDiff(float diff) {
 float diff2 = diff * diff;

 float r2 = uRoughness * uRoughness;
 float r4 = r2 * r2;

 float denom = (diff2 * (r4 - 1.0) + 1.0);
 denom = 3.141592 * denom * denom;

 return r4 / denom;
}

void main() {
 // ambient light
 vec3 ambient = uAmbientStrength * uLightColor;

 // get light diffusion
 float diff = max(dot(normalize((uLightPos - vWorldPos)), vNormal), 0.0);
 // apply roughness
 float roughnessDiff = getRoughnessDiff(diff);

 vec3 diffuse = roughnessDiff * uLightColor;

 vec3 result = (ambient + diffuse) * uCloudColor;

 gl_FragColor = vec4(result, 1.0);

 #include <grayscale_fragment>
}
This was a cheap way to apply a basic lightning shading from scratch and the result was convincing enough.
Water reflections
The fragment shader I’ve spent the more time writing is undoubtedly the shimmering water one.
At first, I was willing to go with something similar to what Bruno Simon did on the Madbox website, but he did it using an additional mesh along with a set of custom UVs.
Since Nico was already busy with all the modeling, I’ve decided to try another approach. I’ve created myself an additional texture to calculate the wave’s direction instead:
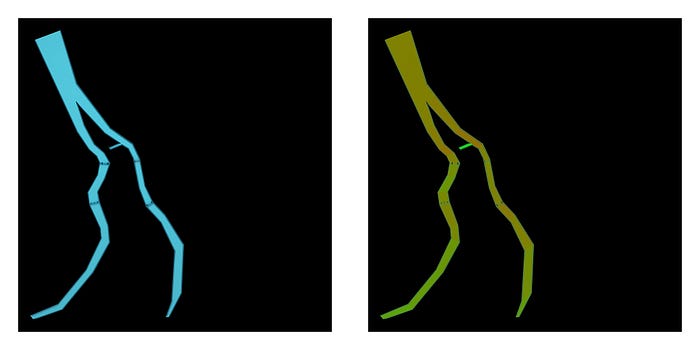
Here the flow direction is encoded in the green channel: 50% of green means the water is going straightforward, 60% of green means the water is flowing a bit to the left, 40% means it’s flowing a bit to the right, and so on…
To create the waves, I’ve used a 2D perlin noise with a threshold. I’ve used a couple other 2D noises to determine the areas where the water would shine, made them move in the opposite direction, and voilà!
varying vec2 vUv;

uniform sampler2D map;
uniform sampler2D tFlow;
uniform float uGrayscale;
uniform float uTime;

uniform vec2 uFrequency;
uniform vec2 uNaturalFrequency;
uniform vec2 uLightFrequency;
uniform float uSpeed;
uniform float uLightSpeed;
uniform float uThreshold;
uniform float uWaveOpacity;

// see https://gist.github.com/patriciogonzalezvivo/670c22f3966e662d2f83#classic-perlin-noise
// for cnoise function

vec2 rotateVec2ByAngle(float angle, vec2 vec) {
  return vec2(
    vec.x * cos(angle) - vec.y * sin(angle),
    vec.x * sin(angle) + vec.y * cos(angle)
  );
}

void main() {
  vec4 flow = texture2D(tFlow, vUv);
  float sideStrength = flow.g * 2.0 - 1.0;

  vec2 wavesUv = rotateVec2ByAngle(sideStrength * PI, vUv) * uFrequency;

  float mainFlow = uTime * uSpeed * (1.0 - sideStrength);
  float sideFlow = uTime * sideStrength * uSpeed;

  wavesUv.x -= sideFlow;
  wavesUv.y += mainFlow;

  // make light areas travel towards the user
  float waveLightStrength = cnoise(wavesUv);

  // make small waves with noise
  vec2 naturalNoiseUv = rotateVec2ByAngle(sideStrength * PI, vUv * uNaturalFrequency);
  float naturalStrength = cnoise(naturalNoiseUv);

  // apply a threshold to get small waves moving towards the user
  float waveStrength = step(uThreshold, clamp(waveLightStrength - naturalStrength, 0.0, 1.0));

  // a light mowing backward to improve overall effect
  float light = cnoise(vUv * uLightFrequency + vec2(uTime * uLightSpeed));

  // get our final waves colors
  vec4 color = vec4(1.0);
  color.rgb = mix(vec3(0.0), vec3(1.0), 1.0 - step(waveStrength, 0.01));

  // exagerate effect
  float increasedShadows = pow(abs(light), 1.75);
  color *= uWaveOpacity * increasedShadows;

  // mix with original texture
  vec4 text = texture2D(map, vUv);

  gl_FragColor = text + color;

  #include <grayscale_fragment>
}
Here’s a live example on Shadertoy if you want to test it.
To help me debug this, I’ve used a GUI to tweak all the values in real-time and find the ones that would work the best (of course, I’ve used that GUI to help me debug a lot of other things).
Post processing
Finally there’s a post processing pass applied using threejs built-in ShaderPass class. It handles the appearing animation, adds a little fish eye on the camera movement when a location is focused and is responsible for small level corrections (brightness, contrast, saturation and exposure).
At some point we also tried to add a bokeh pass, but it was way too performance intensive and we dropped it soon after.
Debugging with spector
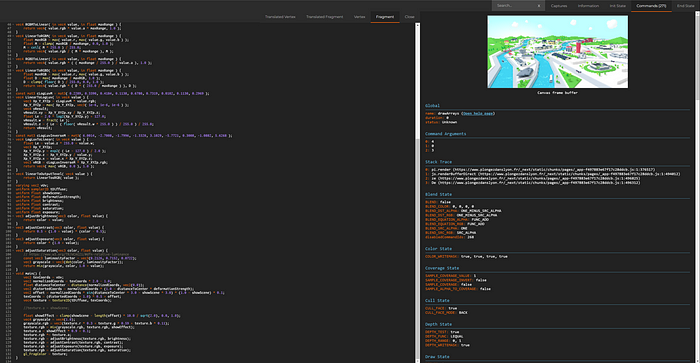
You can always have an in-depth look at all the shaders used by installing the spector.js extension and inspecting the WebGL context.
If you’ve never heard of it, spector.js works with every WebGL website. It’s always super convenient if you want to check how some WebGL effects are achieved!
Performance optimizations
I’ve used a few tricks to optimize the experience performances. Here are the two most important:
First of all, and this one should be a habit: only render your scene if you need it.
This might sound silly but it is still often underrated. If your scene is hidden, by an overlay, a page or whatever, just don’t draw it!
renderScene() {
 if(this.state.shouldRender) this.animate();
}
The other trick I’ve used is to adapt the scene’s pixel ratio based on the user GPU and screen size.
The idea is to detect first the users’ GPU with detect-gpu. Once we’ve got the GPU estimated fps, we use the actual screen resolution to calculate an enhanced estimation of that fps measure in real conditions. We can then adapt the renderer pixel ratio based on those numbers at each resize:
setGPUTier() {
 // GPU test
 (async () => {
   this.gpuTier = await getGPUTier({
     glContext: this.renderer.getContext(),
   });

   this.setImprovedGPUTier();
 })();
}

// called on resize as well
setImprovedGPUTier() {
 const baseResolution = 1920 * 1080;

 this.gpuTier.improvedTier = {
   fps: this.gpuTier.fps * baseResolution / (this.width * this.height)
 };

 this.gpuTier.improvedTier.tier = this.gpuTier.improvedTier.fps >= 60 ? 3 :
   this.gpuTier.improvedTier.fps >= 30 ? 2 :
     this.gpuTier.improvedTier.fps >= 15 ? 1 : 0;

 this.setScenePixelRatio();
}
Another common approach is to constantly monitor average FPS over a given period of time and adjust the pixel ratio based on the result.
Other optimizations include using multisampled render target or not depending on GPU & WebGL2 support (with a FXAA pass as a fallback), use an event emitter for mouse, touch and resize events, using gsap ticker as the only requestAnimationFrame loop of the app, etc.
Wrapping up
All in all we had a great time building this interactive map of our hometown.
As we’ve seen, crafting an immersive WebGL experience like this one, with a lot of things to render in real time, is not that difficult. But it sure needs a bit of organization and a clean codebase with multiple files allows to debug, add or remove features with great ease.
With that architecture, it is also possible to add or remove scene objects super easily (as it is just a question of editing Javascript objects), allowing for convenient further site updates if needed.
Client
ONLYON Tourism and conventions
Team
Production & design: Danka
3D artist: Nico Icecream
Dev: Martin Laxenaire
Stack
Nextjs & React, hosted on Vercel
GSAP
Threejs
detect-gpu
lil-gui & stats.js for debugging purposes
Thanks a lot for reading!
If you have any question or just want to chat, you can reach me out on Twitter.
